


The Definitive Guide for Long Exposure in Photography You Should Know
Last Updated on September 20, 2025 by Peter Wood
Long-exposure photography is a complex technique to master. If you have found some stunning or dreaming shoots for landscapes, polar aurora, or wire wool spinning, it is the photographic skill you should master. What should you do for capturing long-exposure photography? Is there a method to create a long exposure effect with post-processing? Just learn more about the best methods to help you out from the article.

Part 1: What is Long Exposure in Photography
Long exposure is an excellent photographic skill that you can take advantage of shutter speed, ISO, and aperture to add drama effects to photos without post-processing. It is a frequently used term in photography to refer to a type of photography in which a slow shutter speed is chosen, which is used to increase the length of exposure to achieve a special photographic effect on your photos.
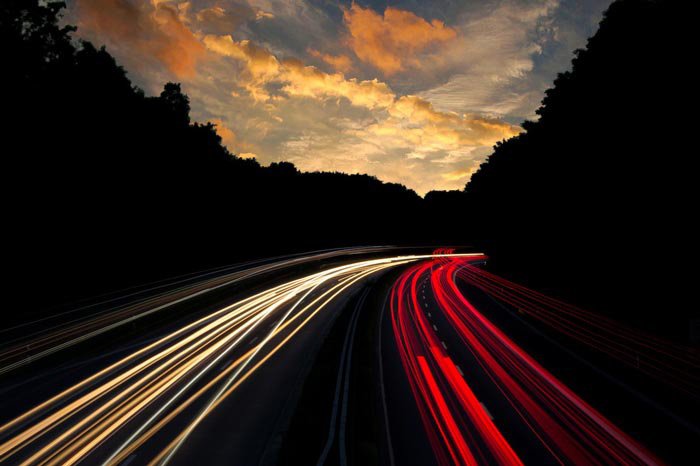
What is long-exposure photography? In general, a shutter time of more than one second can be considered as long exposure photography. But taking the desired photo is not easy; a 5-second exposure will result in a dramatically different image than a one-minute exposure. It is the reason that you need to consider the exposure time for such a photo. Since long exposure photos are mainly used for photos in motion, usually used to show the trajectory of the object's movement, a long shutter time is needed to ensure that the object's movement time can be recorded.

Is that all for a stunning long exposure photo? No. You have to use a tripod to make sure that you can take sharp and neat shots. Pick the optimal terrain and time to capture everything required for composition. Moreover, you have to take a test, adjust the camera settings, mount the filters, and even calculate the shutter speed.

Part 2: How to Take Long Exposure Shoots with Stunning Effect
Do you want a try taking long exposure shots now? Just prepare the digital cameras, wide-angle lenses, and high-quality tripods. Since the photographic technique is used to record objects in motion, an ordinary lens cannot capture the full range of motion, and a wide-angle lens to record the full range of motion in the photo. Tripod is also long exposure photography must be, because the shutter time is long, relying on arm strength alone, it is almost impossible to maintain the lens stable.
Step 1: Observe the scene. When you need go to shoot a scene in motion, the weather, terrain, angle, time, and other factors are important, you have to prepare everything well and calculate the shutter speed. The premise of your photo shoot is to make an observation of the scene, and consider whether it is suitable for shooting long-exposure photography.

Step 2: Adjust the shutter to the manual setting. When you want to shoot long exposure images, the shutter time required is more than 30 seconds, and the camera shutter will automatically switch to manual mode. Just set the ISO value at 64 or 100, and the aperture will be based on the scene test shots to find the most suitable aperture.

Step 3: Install the tripod to ensure stability for shooting the desired photos. At this point, you can take a test shot to see if it meets the requirements. If you have overexposure in the test shot, it is best to need a gray-scale filter that can help well reduce the problem of overexposure. After that, you can start the shooting now!
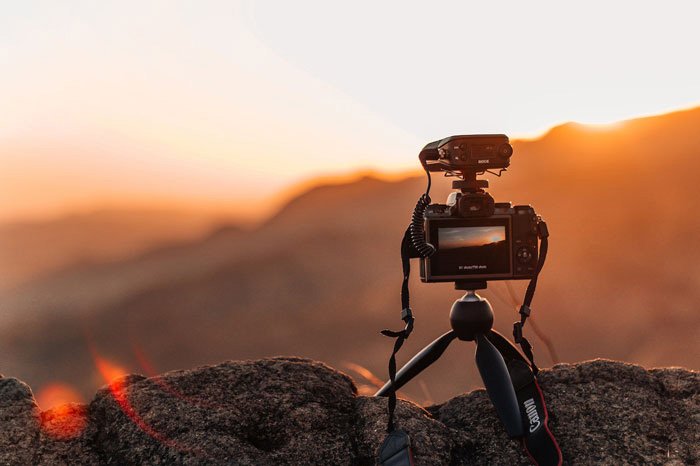
Here are 3 basic factors for long-exposure shooting. There are other factors you need to consider, such as the movement speed of the object, the degree of blur presented in the photo, and the intensity of the light at the scene of the shooting. Just take the above factors to tweak shutter speed, ISO, and aperture before shooting long exposure images.
Part 3: How to Use After-Processing for Long Exposure
Just as mentioned above, it should be difficult to take a long-exposure image. Is there an alternative to turn a normal photo into a long exposure one? If you need to take a stunning shot in a short period, WidsMob AI Retoucher is the desired photo editor for post-processing long-exposure photos. Besides the basic super nature filter to apply a long exposure effect, it also enables you to remove the noises. Moreover, you can adjust the lights, apply the B/W analog film effect, or even turn photos into paintings.
1. Turn ordinary photos into long exposure images with super nature easily.
2. Adjust exposure, contrast, highlights, shadows, saturation, tint, and more.
3. Apply AI cartoonize, AI style transfer, and other effects within one click.
4. Provide some basic editing features to rotate, zoom, crop, and flip images.
Step 1: Once you have installed WidsMob Retoucher, you can launch the program on your computer and click the Import button to add the desired image. Of course, you can also drag-n-drop the image into the program to make a long exposure image.

Step 2: Go to the Filters menu from the right toolbar, you can choose the Super Nature option from the list to apply a long exposure filter to the photo. Moreover, you can also apply other filters, such as Soft Light to make the photo stunning within one click.
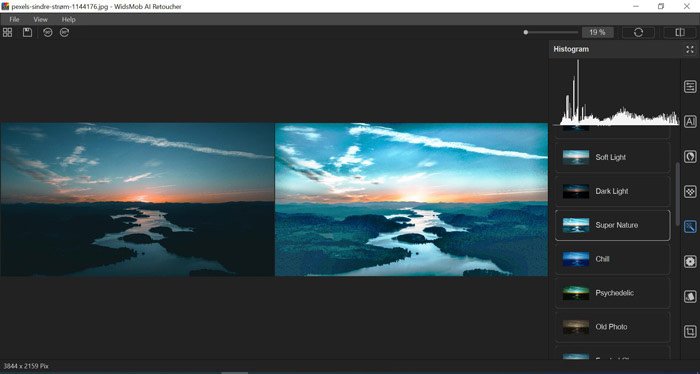
Step 3: When you composite several exposures, it will bring up image noises, you can go to the Adjust menu to remove the noises with chrominance and luminance. Moreover, you can tweak the exposure, contrast, highlights, tint, saturation, and more settings.

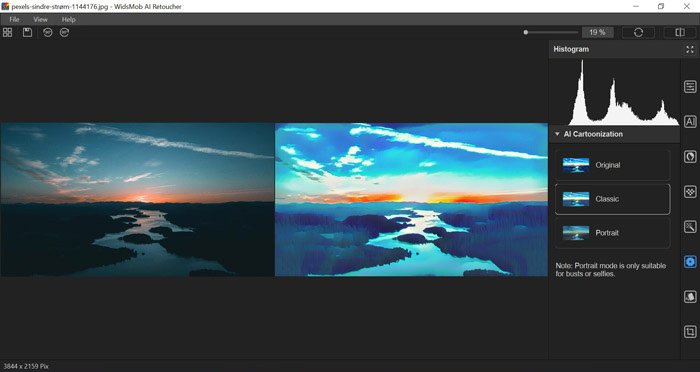
Step 4: Moreover, you can also use turn the images into cartoons with the AI Cartoonization menu, or make the photo into a painting via the AI Style Transfer menu. After that, you can simply click the Save As button to export the desired photo.
Part 4: FAQs about Long Exposure Photography
Conclusion
Taking long-exposure images is a creative process, but it is not easy to get the desired file. It is more about a long time of preparation and waiting for the best time to get the most beautiful photos. The article just shares with you in detail the definition of long exposure photography, the shooting techniques, as well as the post-processing.